We wintered in Saint Raphael - a lovely spot with free parking near the boat and a shower block a short stroll away. The winter prices were reasonable, but as with all the ports here on the Med the waiting list for a long term rental was 5 years long...
The house felt big, cold and echoey so we spent as much time as possible on the boat, either lazy weekends or busy days...
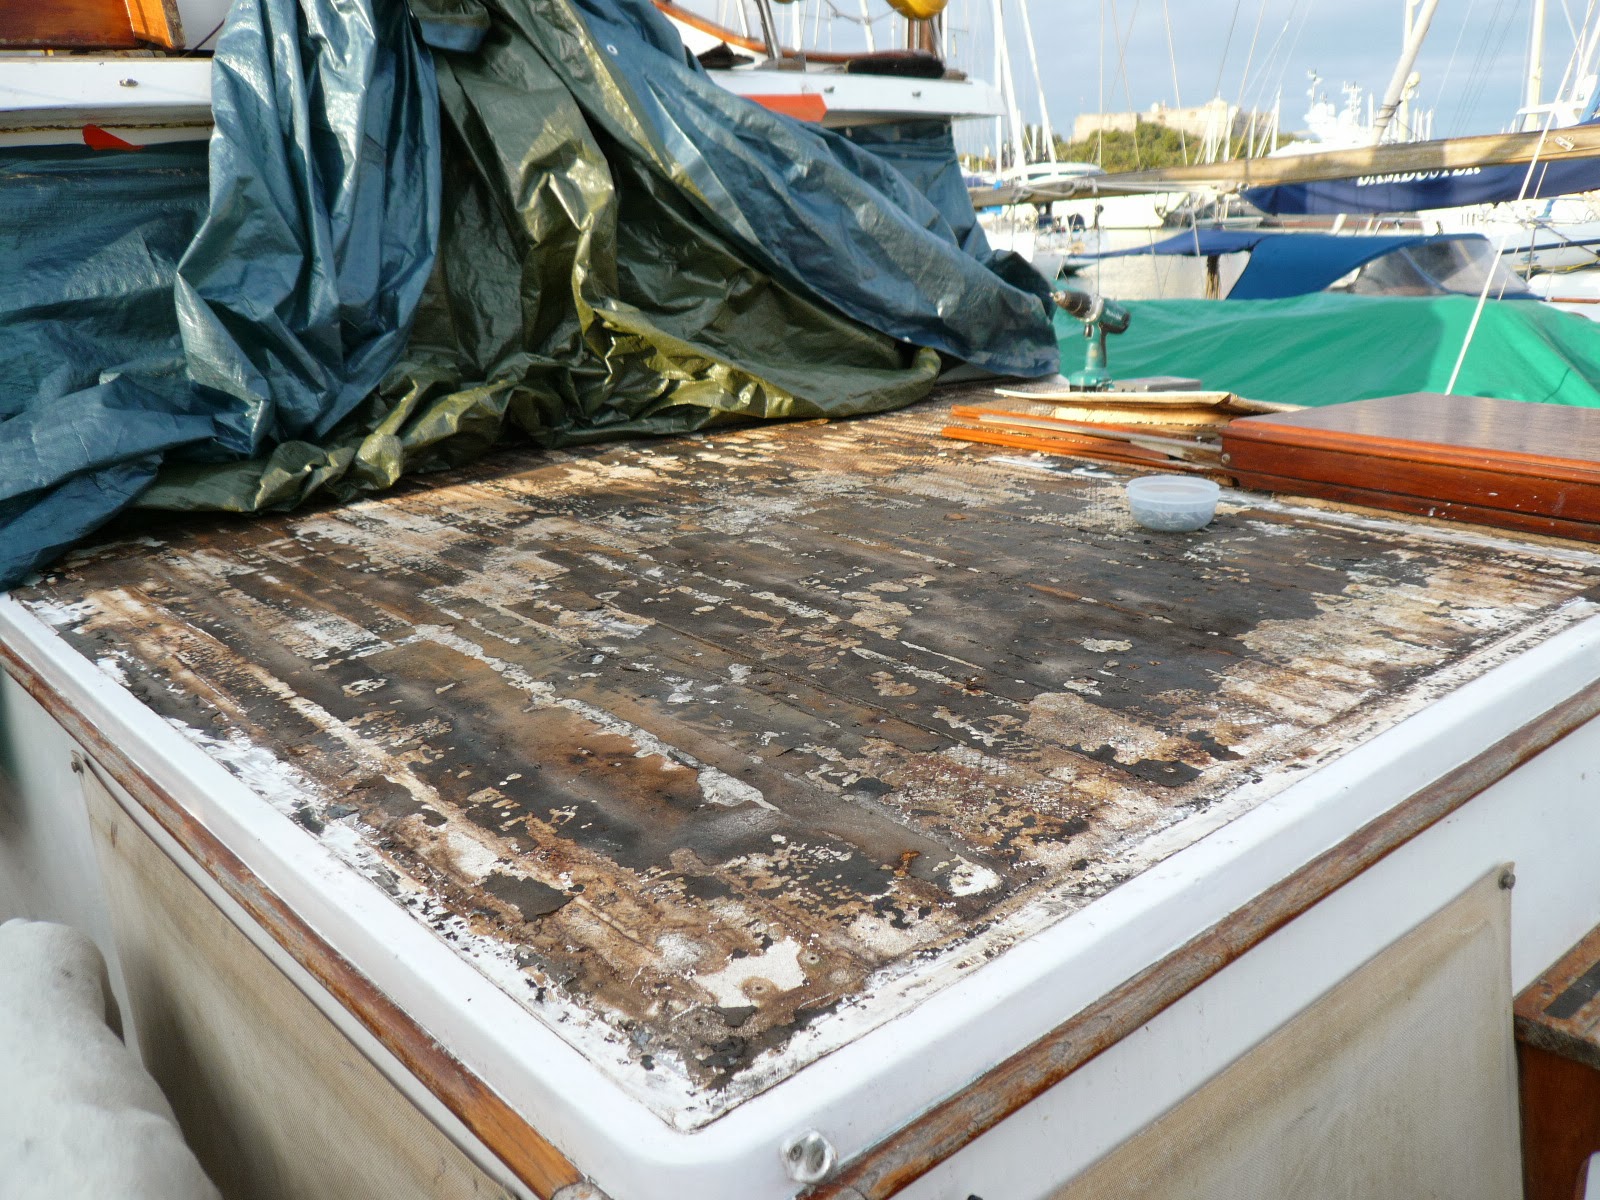
J could be found with her new set of Bahco scrapers, and in no time we had beautiful bare teak capping and hand rails.
 |
| J begins her war on exterior varnish |
A spent alot of time giving the first engine a huge overhaul; he removed all the fresh and sea-water systems, dipped the heat exchanger and the oil cooler and repainted them before reinstallation, changed the thermostat, changed all of the engine hoses and installed a new water temperature guage in the helm with a new sender, all this on top of a full service (new impellers, oil filters,...)
 | |
| It's not that he's been driven to drink, but a coldie always helps ;-) |


Having accepted an offer on our house, we felt that lucky occurrences really did come in threes when we found a space available for long term rent within walking distance from a promising workshop/office location in Mandelieu. We moved the boat over during the May bank holiday weekend, and moored up in front of a watching audience of residents in the pretty complex of apartment blocks on pedestals around a small marina of maybe 100 boats. Ours was the very first berth once past the security barrier, with the fly bridge only a smidge lower than someone's balcony, but the welcome was friendly, and even Roxy made a few friends, including a gorgeous English bulldog called Guapa.

June was a manic month, selling most of our possessions whilst moving onto the boat and into the workshop in time for the house sale on July 15th but we did it, and that evening J was sipping a coldie on the aft deck when the port captain visited to inform us that we were not permitted to sleep onboard so needed to make other arrangements - yikes! Having joked about being homeless, it turns out we really were! The Stares family stepped in, giving us shelter for the night, before Rachel and Ben saved us by handing over the keys to their holiday flat situated between the workshop and the mooring - phew! But we only had til the end of the month (when the flat was rented) to find a permanent solution...
Lets cut a long story short here, and say that on August 1st we moved the Goodbye George to its permanent berth in Antibes! Parking is usually pretty close, conveniences nearby (although waiting with baited breath for them to fix the hot water there) and we're back in town, with a park right nearby - youpi! 8 years since last we lived here, but we're loving it. We have some great neighbours on our quay, and the sail boat next door came out of the same yard, so we exchanged tours after an end of season quay party which they organised - the same trims all over, although Patricia took a tin of white paint to their teak veneers after water damage had ruined them.
Summer here was scorching, and we enjoyed many days out at anchor with friends who brought their dogs, or their jetskis, or both, and always some rosé... Living the dream.

And so, on to the winter works.
A rainy summer in the UK brought no leaks to light, but a hot summer and a naive/uneducated deck hand allowed the teak to dry out and shrink, resulting in interior water leaks of various magnitude - am I now coming to understand the presence of so many oven dishes onboard, so useful as they are to catch a drip?!
(Speaking of ovens, J loves the new one - down a hob to 3, but the door closes properly so takes half the time to cook anything and we also put in a new fridge (with an inverter) to replace the slightly decrepid camping gaz one in the saloon).


Back to the leaks :-( The worst is from round the aft hatch into our cabin, so that was the deck we have attacked first. Our best bet seemed to be removal of the teak so we could seal all the screw holes and seal round the hatch before relaying the wood. This last is a constant source of 'discussion' with J desperate to keep wood decks while A would be very happy with a non-skid coating. In any case, it was likely the decision was out of our hands as if the teak was only going to come up in centimeters with a chisel, as Jerome and Patricia next door found out with theirs, failing a Loto win we'd be non-skid all the way.

Having ordered a set of waterproof covers, J set to with a flat blade screwdriver and hammer and in a day and a half had all the screw plugs out - as well as bruised and blistered hands. The first revelation was that all the screws were stainless (Jerome's brass screw heads all snapped off when he tried to take them out!). Next J borrowed a Fein Multimaster (please Santa, if you're reading this, she REALLY wants one of her very own!) and once the edge planks were forcibly freed up, the deck practically removed itself - one or two planks were casualties, but all in all we now had a bare deck and a pile of numbered teak planks with a matching sketch in order to rebuild the puzzle. The teak was 15mm thick when layed, but we still have a very satisfying 12mm average thickness left to work with - double what you'd get on a new build these days, and we're delighted that we'll be able to recycle and reuse the original timber.

We're lucky to have contacts within the yachting industry in most trades, so now it was time to combine a YouTube crash course with some priceless Michael Valentine advice in order to properly fill all the screw holes with resin before a thorough clean up and laying of a new skin of fibreglass over the whole deck to ensure a full and proper waterproof sealing of the structure. A also took apart and rebuilt the hatch, glassing it into the deck from the outside to make that leak a thing of the past.

 | |
| That's not poor workmanship - we laid peel-ply to give the right finish for the next layer! |
 |
| A skim of Epoxy and we're ready for the next step. If you spotted J missed a bit, details will follow!! |
But I tell you, we've opened a real can of worms...
In taking apart the hatch A found evidence that the leak has been happening for a while - a rotten ceiling panel beside the hatch pretty much coming away in his hand, but its easily replaced and when the finished panel is back in place it'll be as good as new.

We're lucky that our yacht carpenter friend Tim is happy to supply us with the necessary timber at trade rates when he has it in stock, and so far so good!
Back out on deck, the old hand rail mounts were on top of the teak, and our preference on reinstallation would definitely be to bond the mounts to the superstructure rather than the glued down deck, which means we need to make the finished deck dimensions smaller to fit inside the railings. But then without the deck planks underneath, the rails mounts are 15mm too thin... Aie, aie, aie! Back to Tim to get a new set of railing mounts made, all cut to an angle to fit the curve of the deck, and 15mm thicker than the old ones!

No comments:
Post a Comment